Connecting your digital piano to a computer via USB is a significant upgrade that expands musical possibilities for recording, composing, and learning. This connection primarily facilitates MIDI (Musical Instrument Digital Interface) communication, allowing your piano to act as a controller for software instruments and educational applications. By following a few key steps—identifying ports, selecting the correct cable, installing drivers, and configuring software—you can transform your digital piano into a versatile music production and learning hub, ready to interact with Digital Audio Workstations (DAWs) and virtual instruments.
Why Connect Your Digital Piano to a Computer?
The benefits of linking your digital piano to a computer are extensive, making it an essential setup for modern musicians. At its core, this connection primarily facilitates MIDI (Musical Instrument Digital Interface) communication, a protocol that allows electronic musical instruments to communicate with each other and with computers.
One of the most compelling reasons is music production and recording. When you play your digital piano connected to a computer, you can record your performances directly into a Digital Audio Workstation (DAW) like Ableton Live, Logic Pro, or GarageBand. Unlike recording audio, recording MIDI data captures every nuance of your playing—which notes you pressed, how hard (velocity), how long (duration), and any pedal movements. This allows for incredible flexibility: you can correct mistakes without re-recording, change the instrument sound after playing, alter the tempo, or even quantize your performance to perfect timing. It transforms your raw musical ideas into editable, professional-grade tracks. For digital pianos buying guides on this site.
Beyond recording, connecting enables access to a universe of virtual instruments (VSTs). Your digital piano acts as a controller, triggering high-quality software instruments that reside on your computer. This means you’re no longer limited to the sounds built into your piano; you can explore realistic orchestral libraries, vintage synthesizers, exotic world instruments, and endless sonic textures, all controlled by the familiar feel of your piano keys.
For music education and learning, the computer connection is invaluable. Many interactive learning applications and online courses utilize MIDI input to provide real-time feedback on your playing, assess your technique, and guide you through exercises. You can visualize notes as they’re played, track your progress, and even slow down complex pieces to practice at your own pace. Similarly, music notation software allows you to play a piece on your digital piano and have it automatically transcribed into sheet music on your screen, saving countless hours of manual input. This integration empowers both students and teachers with powerful tools for practice, composition, and theory. In essence, connecting your digital piano to a computer unlocks its full potential, transforming it from a standalone instrument into a gateway to limitless creative and educational possibilities.
Understanding Your Digital Piano’s Ports: USB and Beyond
Before you can connect your digital piano to your computer, it’s crucial to understand the types of ports your instrument features. This will determine the specific cable or adapter you’ll need.
USB-to-Host (Type B) and Micro USB: The Most Common Direct Connections
|
Our Picks for the Best Digital Piano in 2026
As an Amazon Associate I earn from qualifying purchases.
|
||
| Num | Product | Action |
|---|---|---|
| 1 | Portable Piano Keyboard, Semi-Weighted Folding Digital Piano 88 Key, Full Size, Wood Grain, Electric Piano Keyboard w/MIDI Bluetooth, Suitable for Adult, Toddler |

|
| 2 | Rhymo Folding Piano Keyboard, 61 Keys Sensitive Electric Piano, Weighted Portable Electric Keyboards with Bluetooth MIDI, Digital Foldable Keyboard for Beginner (Black) |
|
| 3 | Yamaha P225 88-Key Digital Piano with Weighted Keys, Portable Design, Keyboard, Music Rest, Sustain Foot Switch, and Built-In Speakers, Black (P225B) |
|
| 4 | 61 keys keyboard piano, Electronic Digital Piano with Built-In Speaker Microphone, Sheet Stand and Power Supply, Portable piano Keyboard Gift Teaching for Beginners |
|
| 5 | STRICH 88 Key Digital Piano Foldable Full Size Electric Keyboard with Semi-Weighted Sensitive Keys, Portable Electric Piano Set for Beginner, Bundle with Sustain Pedal, Headphones, Music Rest, SEP-88F |
|
| 6 | Roland FP-10 | Compact 88-Note Digital Piano | SuperNATURAL Piano Tones | Authentic Acoustic Feel Keyboard | Great for Beginners & Experienced Players | Bluetooth & MIDI Connectivity |
|
| 7 | Yamaha 88-Key Digital Piano with Weighted Keys, Compact Design, Bluetooth, Keyboard, Music Rest, Sustain Foot Switch, and Built-in Speakers for Home Practice or Travel P145BT |
|
| 8 | Alesis Melody 61 MK4 Keyboard Piano for Beginners with 61 Keys, Speakers, Stand, Bench, Headphones, Tablet/Sheet Music Stand, 300 Sounds and Music Lessons |
|
| 9 | RockJam RJ761 61 Key Keyboard Piano with Keyboard Bench, Digital Piano Stool, Sustain Pedal, Headphones & Lessons |
|
| 10 | Yamaha 88-Key Weighted Portable Digital Piano Keyboard with Music Rest, Sustain Foot Switch, Built-in Speakers, USB Connectivity, Black (P45B) |
|
Most modern digital pianos are equipped with a USB-to-Host port, which is typically a square-shaped USB Type B connector, often labeled “USB TO HOST.” This port is designed for direct connection to a computer. It allows your piano to act as a MIDI controller, sending MIDI data (note on/off, velocity, pedal information, etc.) to your computer and receiving MIDI data back. This is the simplest and most prevalent method for connecting contemporary digital pianos.
Less commonly, some smaller or portable digital pianos, especially those with compact designs, might feature a Micro USB port for computer connectivity. While physically smaller, its function is largely the same as the USB Type B port: to facilitate MIDI communication with your computer. Identifying whether your piano has a USB Type B or Micro USB port is your first step in selecting the correct cable.
MIDI In/Out Ports: When an Adapter is Needed
Older digital pianos, or some professional stage pianos, may not have a USB-to-Host port. Instead, they feature dedicated MIDI In and MIDI Out ports, which are usually round, 5-pin DIN connectors. These ports also transmit MIDI data, but they require an intermediary device to communicate with your computer, which typically only has USB ports. In this scenario, you’ll need a MIDI-to-USB interface. This small device has MIDI In and Out connectors on one end (to plug into your piano) and a standard USB connector on the other (to plug into your computer). When using a MIDI-to-USB interface, you connect the MIDI OUT of your piano to the MIDI IN of the interface, and the MIDI IN of your piano to the MIDI OUT of the interface. The interface then plugs into your computer’s USB port.
The Difference: MIDI Data vs. Audio Signals
It’s vital to distinguish between MIDI data and audio signals. The USB connections discussed primarily transmit MIDI data. MIDI is not sound itself; it’s a set of instructions—think of it as digital sheet music telling a computer what notes to play, how loud, and when. When your piano sends MIDI to your computer, your computer’s software (like a DAW with a virtual instrument) then generates the actual sound.
If your goal is to record the actual sound generated by your digital piano’s internal speakers or headphone output (as opposed to MIDI data which drives software instruments), a direct USB connection might not be sufficient. Some advanced digital pianos can transmit both MIDI and audio over USB, but this is not universal. For high-quality audio recording, especially if your piano only sends MIDI over USB, you would typically need an an audio interface. An audio interface is a dedicated device that converts the analog audio output from your piano (usually via 1/4-inch jack cables) into a digital signal that your computer can record. It then connects to your computer via USB. While this guide focuses on USB for MIDI, it’s an important distinction for comprehensive recording needs.
Essential Gear for a Seamless Connection
To successfully connect your digital piano to your computer, you’ll need a few key components. Having everything ready before you start will ensure a smooth setup process.
Your Digital Piano: Checking its USB Capabilities
First and foremost, you need a digital piano that supports USB connectivity. As discussed, look for a “USB TO HOST” port (typically a square USB Type B) or a Micro USB port on the back or side of your instrument. Consult your piano’s manual if you’re unsure about its connectivity options. Most modern digital pianos from brands like Yamaha, Roland, Casio, Kawai, and Korg come equipped with these ports.
The Right USB Cable: Matching Piano and Computer Ports
Choosing the correct USB cable is critical. The type of cable depends on the specific ports on both your digital piano and your computer.
-
For USB Type B on Piano:
- If your computer has standard rectangular USB Type A ports (the most common type on older laptops and desktops), you’ll need a USB A-to-B cable. This is often referred to as a “printer cable” due to its common use with printers.
- If your computer has the newer, smaller, oval-shaped USB-C ports (found on many modern laptops, especially MacBooks and slim Windows ultrabooks), you’ll need a USB C-to-B cable. Alternatively, you can use a USB A-to-B cable with a USB-C to USB-A adapter.
-
For Micro USB on Piano:
- If your computer has USB Type A ports, you’ll need a USB A-to-Micro B cable.
- If your computer has USB-C ports, you’ll need a USB C-to-Micro B cable. Again, a USB A-to-Micro B cable with a USB-C to USB-A adapter is also an option.
Ensure your cable is of good quality and an appropriate length. Avoid excessively long cables (over 10-15 feet) as they can sometimes lead to signal degradation or latency issues.
Computer Requirements: OS, Free USB Ports
Your computer, whether running Windows (10 or 11) or macOS (recent versions), will need at least one free USB port that matches your chosen cable. Ensure your operating system is up-to-date, as this can help with driver compatibility. While most modern computers are powerful enough to handle MIDI data, if you plan to run multiple virtual instruments or complex DAWs, a computer with a decent processor (Intel i5/Ryzen 5 or better) and sufficient RAM (8GB or more) is recommended for optimal performance.
(Optional) MIDI-to-USB Interfaces for Older Pianos
If your digital piano only has 5-pin MIDI In/Out ports and no USB-to-Host, you will need a MIDI-to-USB interface. These inexpensive devices have MIDI cables on one end and a standard USB plug on the other. Ensure the interface is compatible with your computer’s operating system.
(Optional) Audio Interfaces for High-Quality Sound
As mentioned, if you want to record the actual sound of your digital piano (not just MIDI data) at high quality, an audio interface is highly recommended. These devices connect to your computer via USB and offer professional-grade audio inputs (typically 1/4-inch jacks) where you can plug in your piano’s audio outputs. This provides superior sound quality compared to using your computer’s built-in sound card for recording. While not strictly necessary for basic MIDI connectivity, it’s an important consideration for serious audio recording.
Having all these components ready before you begin the connection process will save you time and potential frustration.
Step-by-Step: Connecting Your Digital Piano to Your Computer
Connecting your digital piano to your computer via USB is a straightforward process, but following the steps in order will help prevent common issues.
Step 1: Gather Your Equipment
Before you begin, ensure you have all the necessary items: your digital piano, the correct USB cable (or MIDI-to-USB interface), your computer, and any required drivers (which you might download from your piano manufacturer’s website).
Step 2: Power Down Both Devices
It’s a good practice to turn off both your digital piano and your computer before making any physical connections. This prevents potential electrical surges and ensures that devices are properly recognized when powered on. Disconnect any power cables if possible, or at least ensure they are off.
Step 3: Physical Connection: Plugging in the USB Cable
Locate the USB-to-Host port (USB Type B or Micro USB) on your digital piano. Plug one end of your chosen USB cable into this port. Then, plug the other end of the USB cable (USB Type A or USB-C) into an available USB port on your computer. If you are using a MIDI-to-USB interface, connect the MIDI OUT cable from the interface to the MIDI IN port on your piano, and the MIDI IN cable from the interface to the MIDI OUT port on your piano. Then, plug the USB end of the interface into your computer.
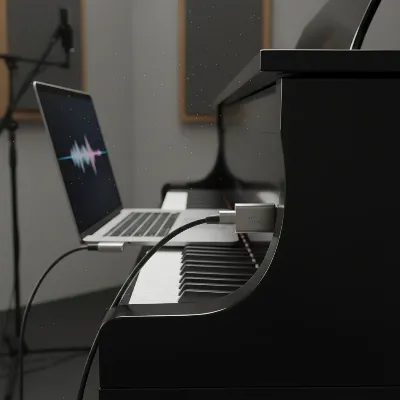 Digital piano with a USB B cable connecting it to a modern laptop with a USB C port
Step 4: Power On Your Devices (Piano First)
Once the physical connection is secure, power on your digital piano first. Wait a few moments for it to fully boot up. Then, power on your computer. This power-on sequence often helps the computer properly detect the newly connected MIDI device.
Step 5: Driver Installation: Ensuring Proper Communication
For many modern digital pianos, especially those using standard USB-MIDI Class Compliant drivers, your computer might automatically recognize the piano without needing additional software. However, some manufacturers require specific drivers for their instruments to function optimally, or to unlock advanced features.
- Check Manufacturer’s Website: Visit the support section of your digital piano manufacturer’s official website. Look for “drivers” or “USB MIDI driver” specific to your piano model and operating system (Windows or macOS).
- Download and Install: Download the latest compatible driver. Follow the installation instructions provided by the manufacturer. It’s often recommended to install drivers before connecting the piano, or to disconnect the piano during installation and reconnect afterward, as per the driver’s specific instructions.
- Restart Your Computer: After installing drivers, restart your computer to ensure they are fully integrated into the system.
Step 6: Software Configuration: Setting up your DAW or Music App
With the hardware connected and drivers installed, the final step is to configure your music software to recognize your digital piano.
- Open Your Software: Launch your preferred Digital Audio Workstation (DAW), music learning application, or MIDI editor (e.g., GarageBand, Logic Pro, Ableton Live, FL Studio, Cubase, Reaper, Synthesia, MuseScore).
- Access MIDI Settings: Navigate to the software’s preferences, settings, or options menu. Look for sections related to “MIDI,” “Devices,” “Audio/MIDI Setup,” or “External Devices.”
- Enable Your Piano: Within the MIDI settings, you should see a list of detected MIDI input devices. Your digital piano (or the MIDI-to-USB interface) should appear here, often by its brand and model name. Ensure it is enabled or selected as an active MIDI input. You might also need to enable MIDI output if you plan to send MIDI data from your computer back to your piano.
- Create a Track (DAW): If using a DAW, create a new “MIDI track” or “Instrument track.” Assign a virtual instrument (VST) to this track.
- Monitor Input: Most DAWs and MIDI monitoring tools will show a visual indicator (like a small light or a meter) when MIDI data is being received.
Step 7: Testing the Connection: Confirming MIDI Flow
Now it’s time to test your setup.
- Play Notes: Play a few notes on your digital piano.
- Check Software: If you’ve set up a virtual instrument in a DAW, you should hear sound coming from your computer speakers/headphones, and potentially see visual indicators (like notes appearing on a piano roll editor or a MIDI activity light flashing). If you’re using a learning app, notes should register on the screen.
- Troubleshoot if Needed: If you don’t hear sound or see any activity, revisit the troubleshooting section below. Double-check your cable, driver installation, and software settings.
Congratulations! Your digital piano is now connected to your computer, ready for a world of musical exploration.
Unleashing Creativity: Software for Your Connected Piano
Once your digital piano is successfully connected to your computer, you unlock a powerful suite of software tools that can improve your musical journey. These applications leverage the MIDI data sent from your piano to enhance learning, composition, recording, and performance.
Digital Audio Workstations (DAWs): Recording, Composing, Mixing
A Digital Audio Workstation (DAW) is the central hub for music production on your computer. When your digital piano is connected, it acts as the primary input device for these powerful programs.
- Recording: You can record your piano performances as MIDI data onto individual tracks. This data is incredibly flexible, allowing you to edit notes, change timing, alter dynamics, and even swap out instrument sounds after the performance.
- Composing: DAWs provide a comprehensive environment for arranging and composing music. You can layer multiple MIDI tracks, each controlled by your piano, to build complex arrangements with drums, bass, strings, and more.
- Mixing and Mastering: Beyond MIDI, DAWs allow you to mix your tracks, add effects (reverb, delay, compression), and prepare your music for sharing.
Popular DAWs include:
- GarageBand (macOS): Free and user-friendly, excellent for beginners.
- Logic Pro (macOS): A professional-grade DAW with extensive features, built on GarageBand’s foundation.
- Ableton Live: Renowned for live performance and electronic music production, also highly capable in studio settings.
- FL Studio: Popular for beat-making and electronic genres, with a unique pattern-based workflow.
- Cubase: A long-standing professional DAW with robust MIDI and audio capabilities.
- Reaper: A highly customizable and affordable DAW, favored by many independent producers.
Virtual Instruments (VSTs): Expanding Your Sound Palette
Virtual instruments, often called VSTs (Virtual Studio Technology) or AUs (Audio Units on macOS), are software plugins that generate sound. Your connected digital piano becomes the controller for these instruments.
- Realistic Sounds: Access incredibly realistic piano libraries, orchestral instruments, guitars, drums, and synthesizers that often surpass the quality of sounds built into your digital piano.
- Endless Variety: The world of VSTs is immense, offering everything from emulations of vintage analog synthesizers to futuristic soundscapes and unique ethnic instruments. This allows you to experiment with any genre or sonic texture imaginable.
- Cost-Effective: While some premium VSTs can be expensive, many high-quality free and affordable options are available, giving you a vast array of sounds without needing to buy multiple hardware instruments.
Music Education & Notation Software: Learning and Transcribing
For students and teachers, dedicated music software can significantly enhance the learning experience.
- Interactive Learning Apps: Programs like Synthesia, Flowkey, or Playground Sessions connect to your MIDI piano and provide real-time feedback, interactive lessons, and gamified approaches to learning songs and techniques. They often display sheet music or “falling notes” and wait for you to play correctly before moving on.
- Notation Software: Programs such as MuseScore (free), Sibelius, or Finale allow you to play directly on your digital piano, and the software automatically transcribes your performance into standard musical notation. This is invaluable for composers, arrangers, and students who want to create or analyze sheet music. You can also manually input notes, arrange scores, and print professional-quality sheet music.
- Ear Training and Theory Apps: Many applications use MIDI input to help you practice ear training, understand music theory concepts, and develop your sight-reading skills in an interactive way.
By integrating your digital piano with these software tools, you unlock a new dimension of musical creativity and learning, making your setup more versatile and powerful than ever before.
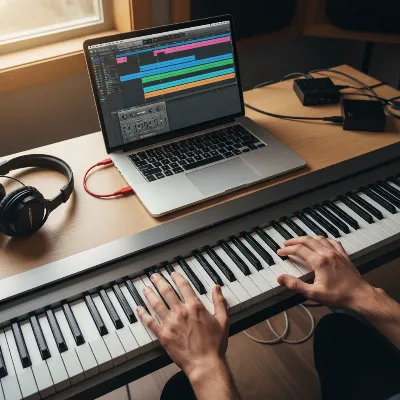 Digital piano connected to a laptop showing a music production software interface
Troubleshooting Common Connection Issues
Even with careful setup, you might encounter issues when connecting your digital piano to a computer. Here are some common problems and their solutions to help you get back to making music.
“No Signal” or Unrecognized Device
This is one of the most frequent issues. If your software isn’t showing any MIDI activity or recognizing your piano:
- Check Physical Connections: Ensure the USB cable is securely plugged into both your digital piano and your computer. Try a different USB port on your computer, as some ports might be faulty.
- Correct Cable: Verify you are using the correct USB cable type (e.g., A-to-B, C-to-B, or Micro USB) for your specific piano and computer ports.
- Power On Sequence: Always turn on your digital piano first, then your computer. Try power cycling both devices.
- MIDI/Local Control Settings: Some digital pianos have internal settings for “MIDI Local Control” or “MIDI USB.” Ensure that the USB MIDI function is enabled and Local Control is set to “Off” when using the piano as a controller for software instruments (to avoid “double triggering” sounds). Consult your piano’s manual.
- Test with Another Cable/Computer: If possible, try a different USB cable, or connect your piano to another computer to rule out a faulty cable or a specific computer issue.
Driver Problems and Updates
Drivers are crucial for communication, and they can be a source of problems:
- Install Correct Drivers: As discussed, ensure you have downloaded and installed the latest USB MIDI drivers specifically for your digital piano model and operating system from the manufacturer’s website. Generic drivers might not always work perfectly.
- Reinstall Drivers: If you suspect a driver issue, uninstall the existing driver from your computer’s device manager (Windows) or MIDI Studio (macOS), then restart your computer and reinstall the latest version.
- Operating System Updates: Ensure your computer’s operating system (Windows or macOS) is up-to-date. Sometimes, OS updates include improved USB or MIDI support.
- Driver Compatibility: Older pianos might not have drivers compatible with the latest operating systems. Check the manufacturer’s specifications for OS compatibility.
Addressing Latency and Delay
Latency is the delay between playing a note on your piano and hearing the sound from your computer. While some delay is inherent in digital systems, excessive latency can be frustrating.
- Audio Interface: The best solution for significant latency is often to use an external audio interface. These devices have dedicated audio drivers (ASIO on Windows, Core Audio on macOS) that process sound much more efficiently than your computer’s built-in sound card.
- Buffer Size: In your DAW or music software’s audio/MIDI settings, look for “Buffer Size” or “Latency.” Lowering the buffer size reduces latency but requires more processing power from your computer, which can lead to crackling or dropouts if set too low. Start with a medium setting (e.g., 256 samples) and gradually reduce it until you find a balance between low latency and stable performance.
- Sample Rate: Ensure your sample rate (e.g., 44.1 kHz or 48 kHz) is consistent across your DAW, audio interface (if used), and operating system settings.
- Close Other Applications: Close any unnecessary programs running in the background on your computer to free up CPU resources.
- Dedicated Hardware: If latency remains a major problem, especially with many virtual instruments, consider upgrading your computer’s processor or RAM.
Checking Cables and Ports
Sometimes the simplest things are the cause:
- Damaged Cable: USB cables can fray internally, especially if they are frequently bent or pulled. Try a different cable to see if the issue resolves.
- Faulty USB Port: Your computer’s USB ports can wear out or become damaged. Test different USB ports on your computer.
- Hub Issues: If you’re using a USB hub, try connecting your piano directly to a port on your computer. Unpowered USB hubs can sometimes cause issues.
By systematically going through these troubleshooting steps, you should be able to identify and resolve most common connection issues, ensuring a smooth and enjoyable experience with your digital piano and computer.
Maximizing Your Digital Piano Connection
Once your digital piano is successfully connected, there are several ways to optimize your setup and unlock its full potential. By fine-tuning settings and exploring advanced features, you can enhance your musical workflow and creative output.
Optimizing Settings for Performance
Achieving optimal performance with your connected digital piano involves more than just plugging in a cable. It requires careful attention to software and system settings.
- DAW/Software Audio Settings: As mentioned in troubleshooting, adjusting the buffer size in your Digital Audio Workstation (DAW) or music software is key to balancing latency and system stability. Experiment with different buffer sizes: lower settings reduce delay but demand more CPU, while higher settings increase delay but are more stable. Find the sweet spot for your system. Also, ensure your sample rate (e.g., 44.1kHz or 48kHz) is consistent across your DAW, your audio interface (if you’re using one), and your computer’s sound settings. Mismatched sample rates can cause audio glitches or prevent sound altogether.
- Dedicated Audio Drivers: If you’re using an external audio interface, make sure you’ve installed its specific, low-latency drivers (e.g., ASIO drivers on Windows). These drivers are designed to bypass your operating system’s generic audio processing, providing a more direct and efficient path for audio signals, drastically reducing latency compared to standard drivers.
- Power Management: Ensure your computer’s power settings are optimized for performance, especially on laptops. Disable any “power saving” modes that might throttle your CPU, which can lead to audio dropouts or MIDI timing inconsistencies. In Windows, select the “High Performance” power plan. On macOS, ensure you’re not running in Low Power Mode.
Regular Driver and Software Updates
Keeping your software and drivers up-to-date is crucial for stability, compatibility, and accessing new features.
- Piano Drivers: Periodically check your digital piano manufacturer’s website for updated USB MIDI drivers. Manufacturers often release updates to improve compatibility with new operating systems, fix bugs, or enhance performance.
- DAW/Music Software: Regularly update your DAW, virtual instruments, and learning applications. Software developers frequently release patches, performance enhancements, and new functionalities. Always back up your projects before undertaking major software updates.
- Operating System: While not always necessary, keeping your computer’s operating system (Windows or macOS) updated can sometimes resolve underlying USB or MIDI communication issues, as OS updates often include improvements to device handling.
Exploring Advanced MIDI Features
The MIDI connection offers more than just playing notes; it opens doors to advanced control.
- MIDI Mapping: Most DAWs allow you to “MIDI map” controls on your digital piano to functions within the software. For example, you could assign your piano’s sustain pedal to control a filter sweep on a synthesizer VST, or use assignable knobs/sliders on your piano (if present) to control parameters like volume, pan, or effect sends in your DAW. This creates a highly customized and intuitive workflow.
- Controller Assignments: Many advanced digital pianos feature assignable buttons, knobs, or sliders that can transmit specific MIDI CC (Control Change) messages. Learn how to configure these on your piano to control various parameters in your software, such as modulating a synth sound or adjusting expression.
- MIDI Clock Sync: If you’re combining your digital piano with other MIDI devices or drum machines, understanding MIDI clock synchronization is essential. This ensures all your instruments play in perfect time with your DAW’s tempo, creating a cohesive musical performance or recording.
- MIDI Monitor Tools: Use a MIDI monitoring tool (often built into DAWs or available as standalone utilities) to visualize the MIDI data being sent from your piano. This can be invaluable for troubleshooting and understanding exactly what messages your piano is sending to your computer.
By actively managing these settings and exploring the deeper functionalities of MIDI, you can improve your connected digital piano into an even more powerful and integrated part of your musical ecosystem, enabling a seamless and creatively inspiring experience.
Conclusion
Connecting your digital piano to a computer via USB is a pivotal step that significantly broadens your musical horizons. It transforms your instrument from a standalone device into a versatile controller, allowing you to examine the rich worlds of music production, interactive learning, and sound design. By understanding the different USB port types, selecting the correct cable, diligently installing drivers, and configuring your software, you unlock the ability to record detailed MIDI performances, use the power of countless virtual instruments, and engage with advanced educational tools.
Embracing this connection empowers you to capture your musical ideas with precision, experiment with an infinite palette of sounds, and refine your skills with intelligent feedback. Whether you aspire to produce professional-grade tracks, compose intricate pieces, or simply enhance your practice routine, a digital piano connected to your computer is an indispensable setup. So, take the plunge, explore the possibilities, and let your creativity flow freely. What musical projects will you embark on now that your digital piano is connected?
Frequently Asked Questions
What is the difference between USB A-to-B and USB C-to-B cables for digital pianos?
A USB A-to-B cable connects a digital piano with a square USB Type B port to a computer with a standard rectangular USB Type A port. A USB C-to-B cable serves the same function but is used when your computer has the newer, smaller, oval-shaped USB-C ports. Both transmit MIDI data.
Do I always need to install drivers to connect my digital piano via USB?
Not always. Many modern digital pianos are “class compliant,” meaning they use generic USB-MIDI drivers built into your operating system (Windows or macOS) and don’t require separate driver installation. However, some manufacturers still provide custom drivers that can offer better performance or unlock advanced features, so it’s always best to check their website.
Can I record audio from my digital piano through the USB connection?
Most standard USB-to-Host connections on digital pianos are designed primarily for MIDI data, not audio. While some advanced digital pianos can transmit both MIDI and audio over USB, it’s not universal. For high-quality audio recording, you typically need to connect your piano’s audio outputs to an external audio interface, which then connects to your computer via USB.
Why is there a delay (latency) when I play notes through my computer’s software?
Latency occurs because it takes time for MIDI data to travel from your piano to your computer, for software to process it, and for the audio to be generated and sent to your speakers. Reducing buffer size in your music software, ensuring up-to-date audio drivers (especially ASIO drivers on Windows), and using a dedicated audio interface are the most effective ways to minimize latency.
What kind of software do I need on my computer to use with my digital piano?
You’ll need a Digital Audio Workstation (DAW) for recording and music production (e.g., GarageBand, Logic Pro, Ableton Live), virtual instrument (VST/AU) plugins to generate sounds, or music learning and notation software (e.g., Synthesia, MuseScore) depending on your goals. Many DAWs come with basic virtual instruments.
Connect Your Digital Piano to a Computer via USB
This guide provides step-by-step instructions to connect your digital piano to a computer using a USB cable, enabling MIDI communication for music production, learning, and sound design.
Collect your digital piano, the correct USB cable (or MIDI-to-USB interface), your computer, and any necessary drivers. Turn off both your digital piano and computer to prevent electrical surges and ensure proper device recognition.
Locate the USB-to-Host port (USB Type B or Micro USB) on your digital piano and plug in one end of the USB cable. Connect the other end (USB Type A or USB-C) to an available USB port on your computer. If using a MIDI-to-USB interface, connect its MIDI cables to your piano's MIDI In/Out ports, then plug the interface's USB end into your computer.
Power on your digital piano first, then your computer. Visit your piano manufacturer's website to download and install any specific USB MIDI drivers for your model and operating system. Restart your computer after driver installation to ensure full integration.
Launch your preferred music software (DAW, learning app, or MIDI editor). Navigate to its preferences or settings, find the MIDI input devices section, and enable your digital piano or MIDI-to-USB interface. Create a new MIDI or instrument track and assign a virtual instrument if using a DAW.
Play a few notes on your digital piano. You should hear sound from your computer speakers/headphones and see visual indicators of MIDI activity within your software. If issues arise, double-check cable connections, driver status, and software settings.
Get our weekly buyer guide
Practical specs, not advice. Unsubscribe anytime.

I’ve been wanting to try recording my own compositions for ages, and this guide was exactly what I needed. I always thought it would be super complicated to get my digital piano to work with my computer, but following the steps for identifying ports and selecting the right cable made it so straightforward. Now I’m finally using a DAW and it’s opened up a whole new world of possibilities for my music!
I was hoping this would help me with some latency issues I’m having when using my piano as a controller for educational applications. While the information about configuring software was good, it didn’t quite solve my specific problem. It’s a good general overview, but I might need to dig deeper into my computer’s audio settings.
This was really helpful for understanding the MIDI communication aspect. I had my piano connected before, but I didn’t fully grasp how it was working with my software instruments. The only minor complaint is that finding the correct drivers for my older model piano was a bit of a hassle, but that’s not really the guide’s fault. Overall, a solid resource.
As a beginner, I was intimidated by the idea of connecting my digital piano to my computer, but this broke it down perfectly. The explanation of how it transforms your piano into a versatile music production and learning hub really resonated with me. I’m excited to explore virtual instruments now that I have everything set up correctly!